Half a lifetime ago I spent the summer before my senior year of college traipsing around the British Isles and Ireland – you know, for “research.” One of those months I spent living in the middle of nowhere on the Isle of Skye, the largest island in the Inner Hebrides of Scotland. It was an … interesting experience, to say the least. I learned the hard way what crabby old Scottish men wear under their kilts, that Calvinists take their Sabbath day VERY seriously, that sheep really do outnumber humans in the Hebrides, and that being a vegetarian in the Scottish Highlands is quite the adventure. At the same time, I got to experience the magical “singing sands” of Eigg, I shared the beach with a herd of cattle (who enjoy the water just as much as we do), I danced the night away at ceilidhs (a neighborhood gathering of song, dance, and storytelling, often held in the barn), and I was lucky enough to meet some amazing people along the way. All in all, the experience made quite an impression on me, and I have a perpetual love of Scottish history, culture, and most especially of their fiber arts.
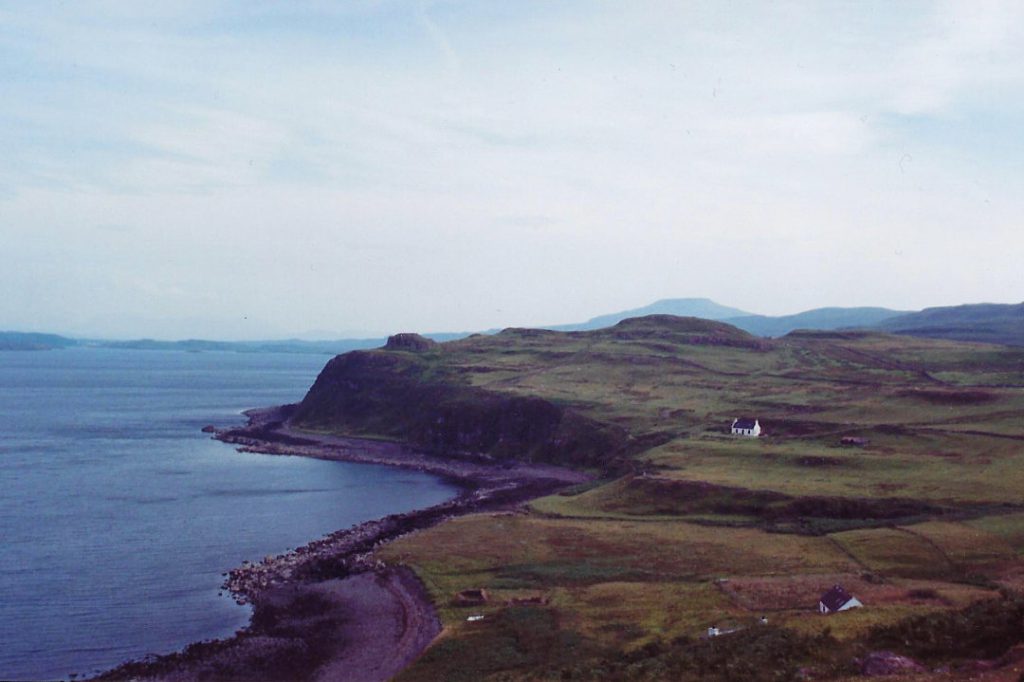
One of my favorite memories was a trip to Portree, the capital of Skye, and quite a metropolis after the hinterlands of Skye. Portree means “King’s Port” (or “port on the slope,” depending whom you ask) in Gaelic, and it is indeed a quaint harbor town with pastel buildings hugging the waterfront and craggy cliffs surrounding it. I love the juxtaposition of the civilized and the wild, which pretty much sums up life in the Scottish Highlands and Islands. I hoped to capture these two faces of Portree in my poncho design.
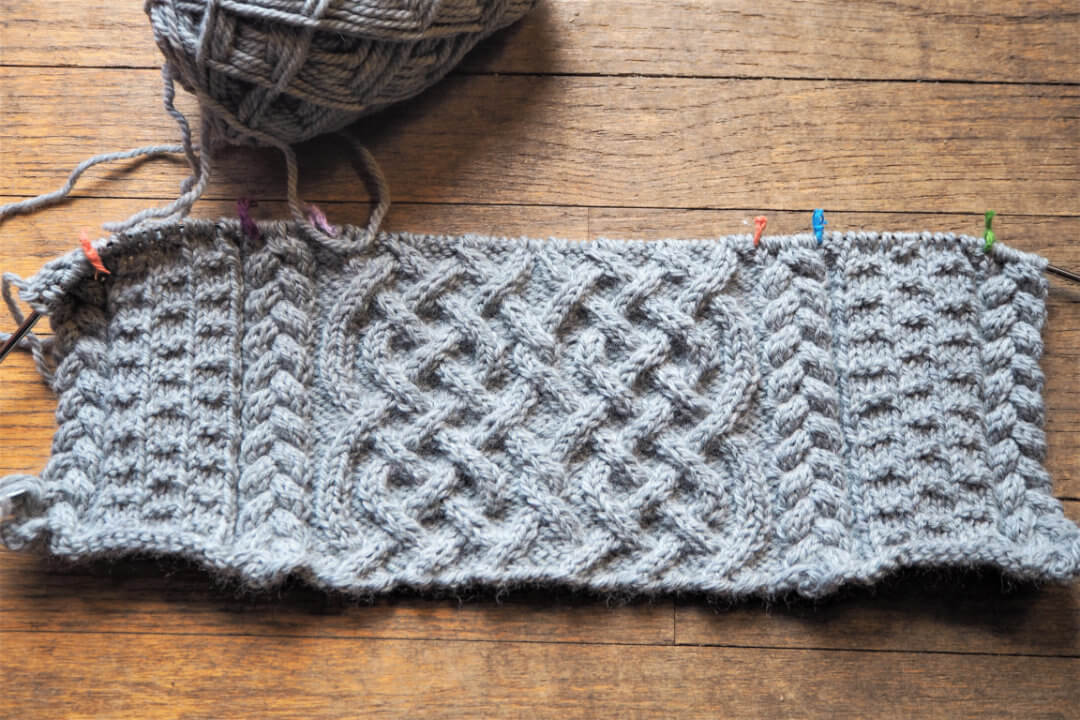
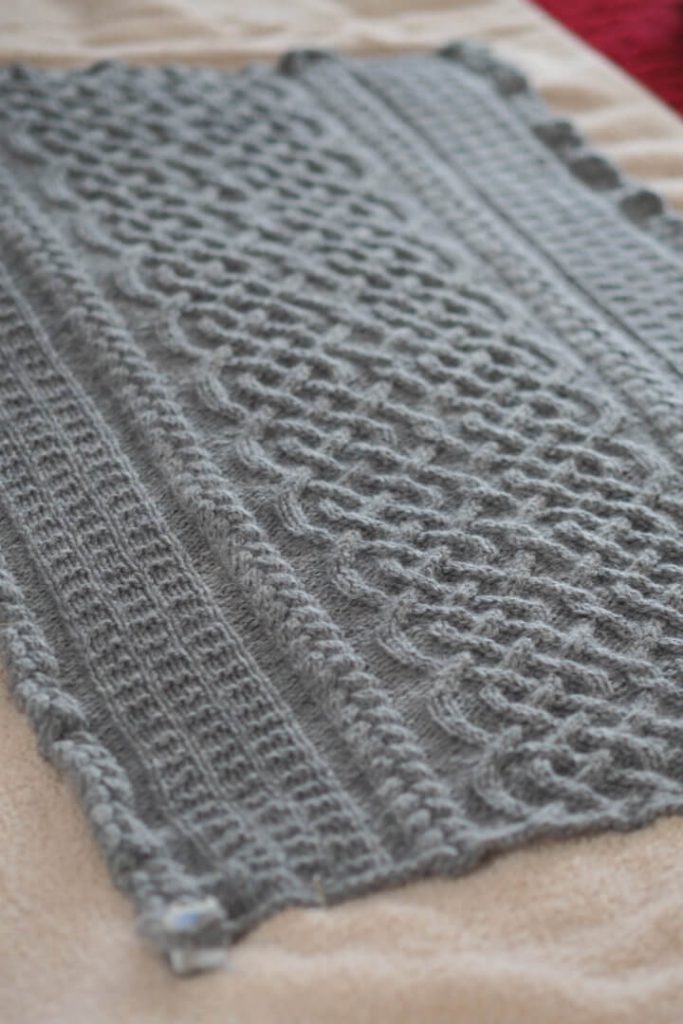
I began with a pattern idea. I’ve always loved the Saxon Braid cable – who doesn’t? – but I feel like it gets overused. So I decided to create two intertwining Saxon Braids as the central pattern of the poncho. The cable is fairly simple, but gives an elegant appearance. I also wanted the poncho to have an interesting finished edge along the neckline, and I love the look of a borderless plait right on the edge, so I incorporated a basic 9-stitch plait. Finally I added a rough looking knit-and-purl pattern that reminds me of the craggy cliffs surrounding Portree.
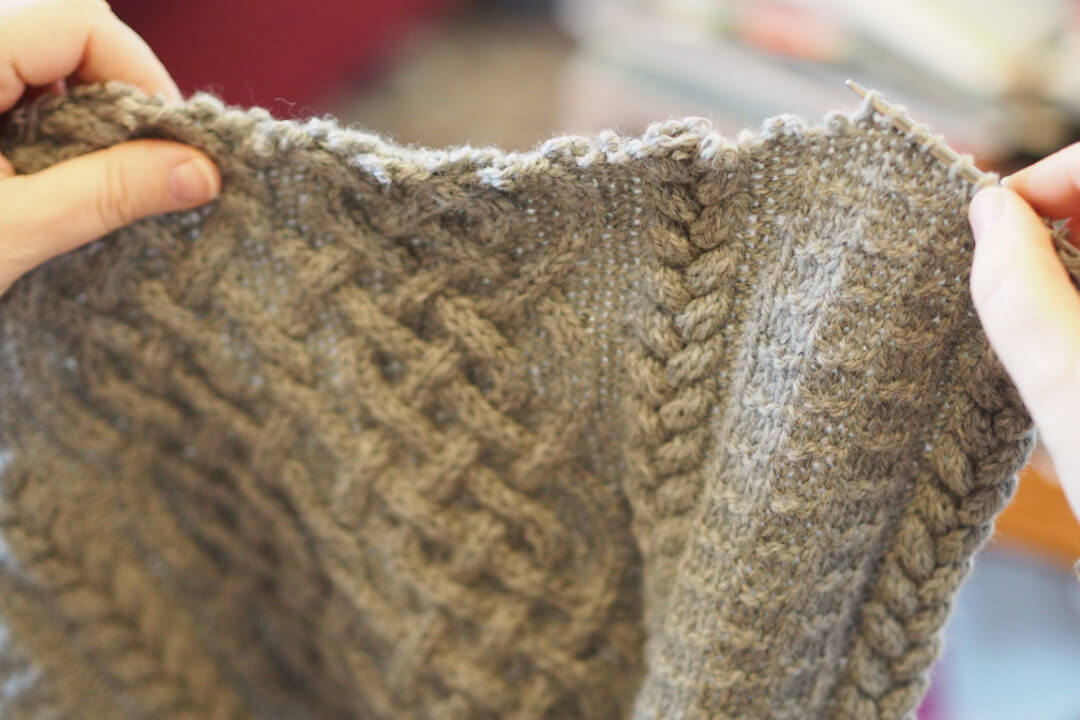
I had already finished one panel, and I was halfway through the second when I realized I would not be happy with a raw bottom edge on the poncho. Ok, right, fine, I thought. I’ll rip out the bind off on the completed panel, and add an I-Cord Bind Off to each panel, and voilà! Problem solved.
Then I realized that, on order for the cables to face the proper direction on both panels, the finishing would need to be on the opposite edge of each panel – one on the bind-off edge, and one on the cast-on edge. CRAP! I could easily write this into the final pattern, but how could I remedy it on my sample? I’d rather extract my teeth one by one than rip out half a panel covered in Aran cables. So I finished the second panel with an I-Cord Bind Off, and then I went to tackle the first panel.
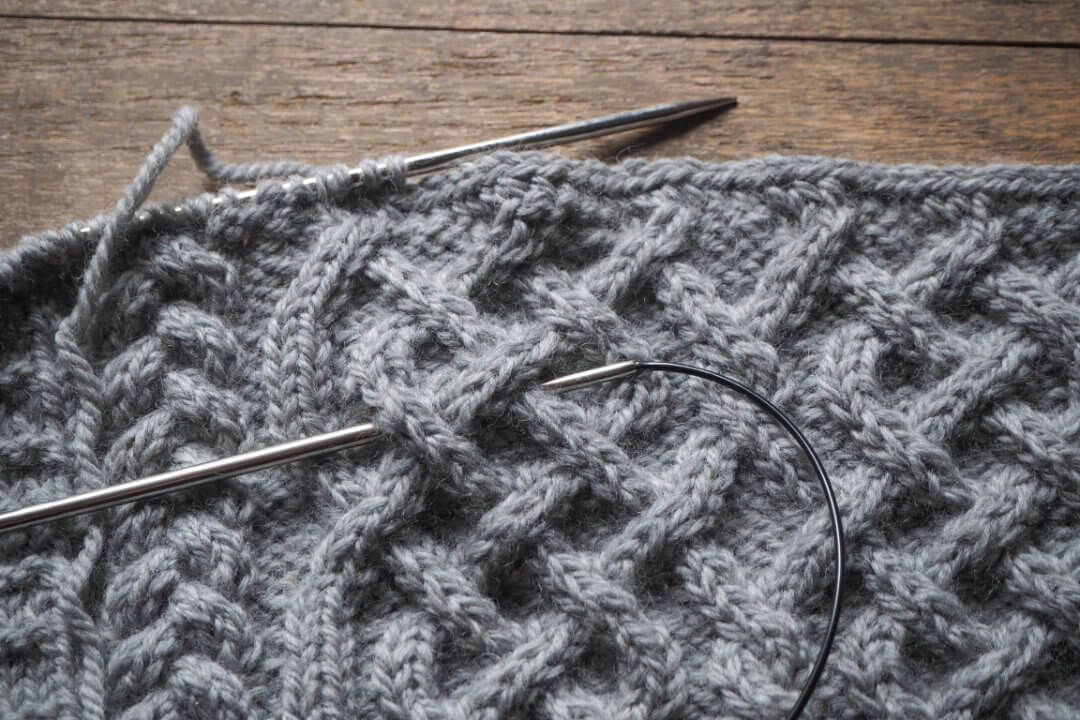
I decided to fix my mistake by removing the cast on edge, picking up the stitches, and finishing with an I-Cord Bind Off. Obviously, you won’t have to go to all this trouble if you follow the pattern! But I thought I’d document it here in case you ever find yourself in a similar situation where you need to add to the cast on edge (if the sleeves or hem of a sweater are too short, for example).
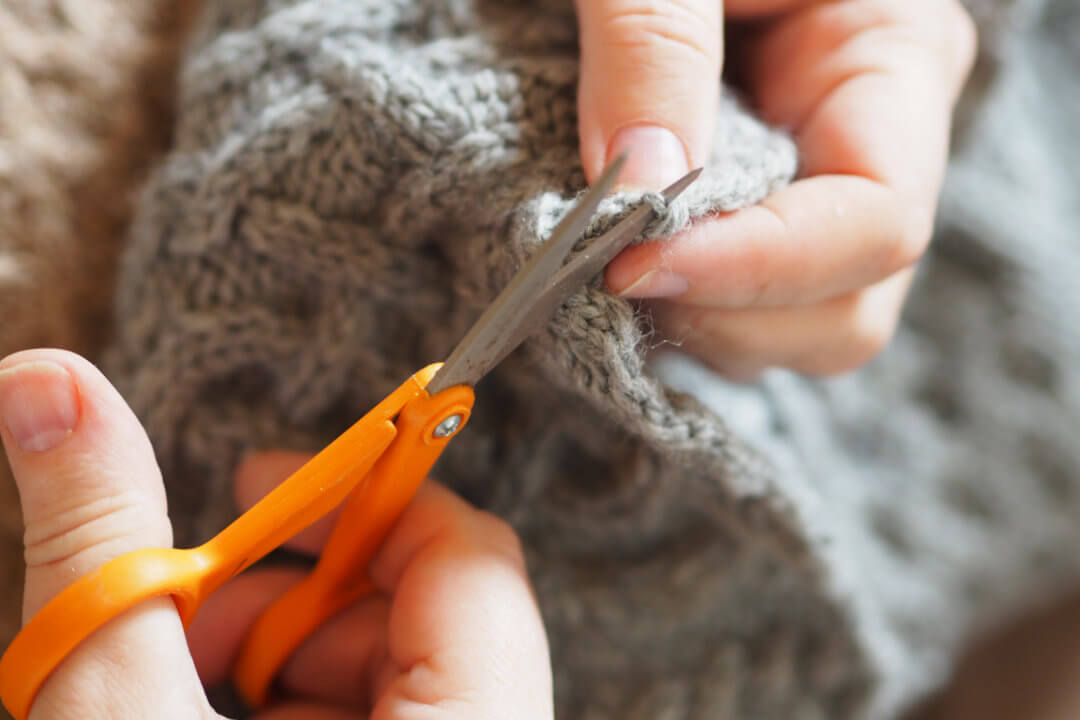
Before you even think about just unraveling a cast-on edge, just don’t. It won’t work. You’ll drive yourself to the point of burning your project if you try. The best way to remove a cast-on edge is to cut it off. Yep, that’s right, you take a scissors to it. Here is how.
First of all, start in the center of your cast-on edge. If you start at either end, the end you’ve unraveled will be too short and will easily unravel up the edge to the next row, or two, or three. So start in the middle. Locate the row above the cast on (the first real knitted row), and carefully snip through it.
Now, using a small size double pointed needle, pick at the end you’ve snipped until you can work it through the next stitch.

Keep unraveling from the center toward the edge, leaving live stitches as you go.
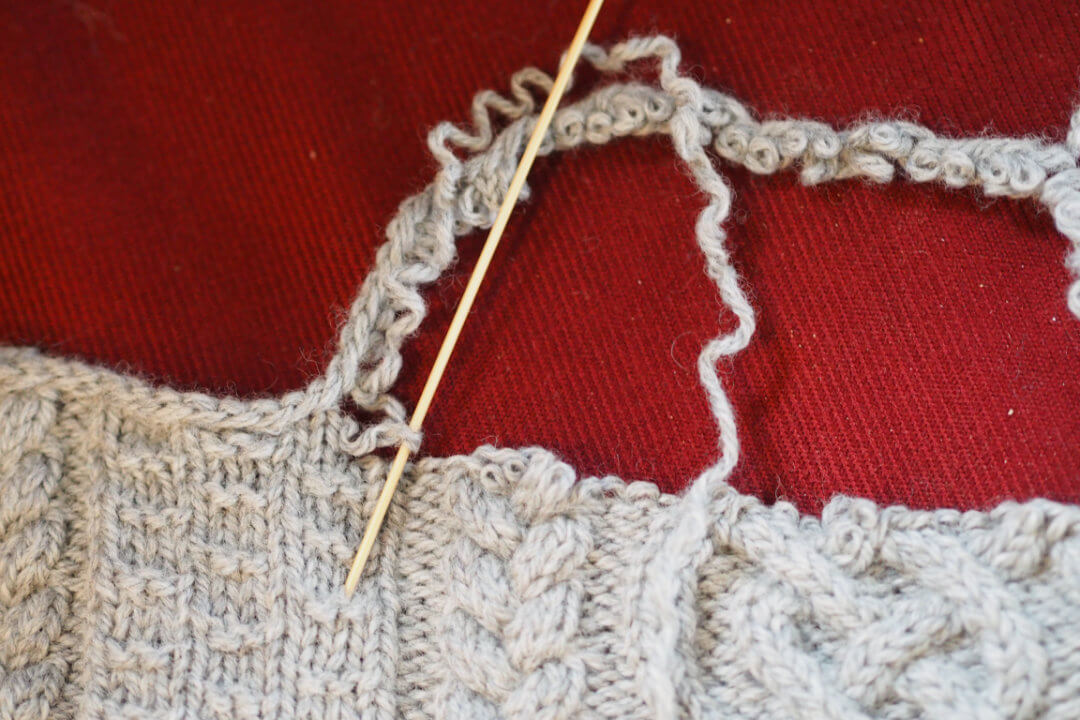
You may want to place those live stitches on a holder or a circular needle so that they don’t get lost. It is also easier to find the end you need to unravel by working on the wrong side of the work (at least in this case, with all the cables). Work all the way to the edge, and then work from the snipped stitch all the way to the other edge. If you haven’t picked up the live stitches yet, you’ll want to do it now.
Then you’ll need to unravel the cast on edge, which is now separated from the body of the garment. “I thought you said it was impossible to unravel a cast-on edge!” you say. Well, you can easily unravel the cast on when working down; the problem arises when you try to unravel it up, by undoing the cast on from the bottom while still attached to the work. Believe me on this. Now that you can unravel down, just pull on the end and work out any kinks until the cast on edge is nothing but a ball of yarn to be reused. You can now work on the picked-up stitches to the desired length, and then bind off using whatever technique you choose (in this case, an I-cord bind off).
OK! Now that my little snafu has been remedied, I can get back to finishing this poncho. Look for a future post on the finishing touches, including seaming.
Hi, I’m Sarah. Sorry but it automatically selected caps. But I was wondering if you have. Pattern for this for sale available? Please feel free to email me and let me know. Hope you have an awesome day.
SARAH oh p.s. my honey and I share the same email, it’s his but we share it.
Hi Sarah! Thanks so much for your interest in this pattern! Yes, the Portree Poncho is available for purchase on Ravelry. Here is the link to Ravelry: https://www.ravelry.com/patterns/library/portree-poncho
I will send you an email as well.