Now that the cat’s out of the bag, so to speak, I can start a series of helpful tutorial posts on all the designs from my Woodland Critters Collection. I also want to highlight some of the design process and inspiration behind this collection! I can’t wait to get started.
Since my Woodland Critters Scarf is the most popular design within the first week of the launch, I thought I’d start with a tutorial related to this design. I have already posted a tutorial on duplicate stitch for my Hedgehogs Smartphone and Tablet Cover pattern, but I thought it might be helpful to post another with photos specific to the Woodland Critters Scarf. So here we go!
Ok, one of my favorite “critters” on this scarf is the fox – I just love foxes! So I’m going to focus on the fox motif for this tutorial.
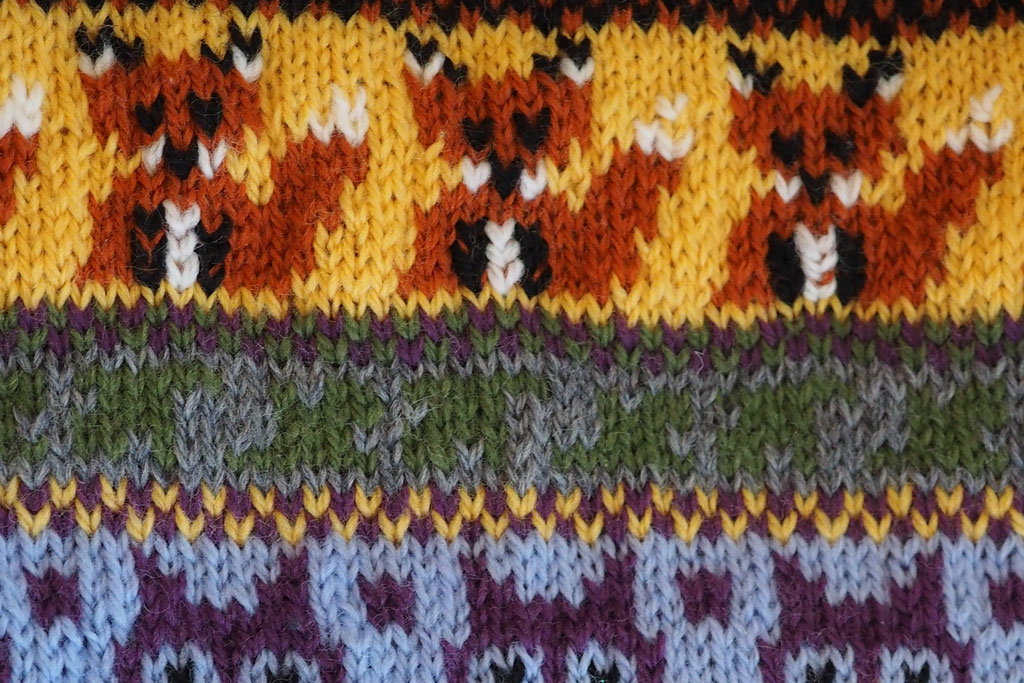
Now, I am not a huge fan of finishing work, so duplicate stitch is just not my thing. I’d rather slog through a round with four colors and take the time to untangle every few stitches rather than wait until the end and have to add colors after the fact. That’s just me! I recognize that other knitters feel differently, and so I offer this lovely tutorial on adding colors with duplicate stitch!
Here is what your fox motif will look like if you follow the duplicate stitch chart in the pattern:
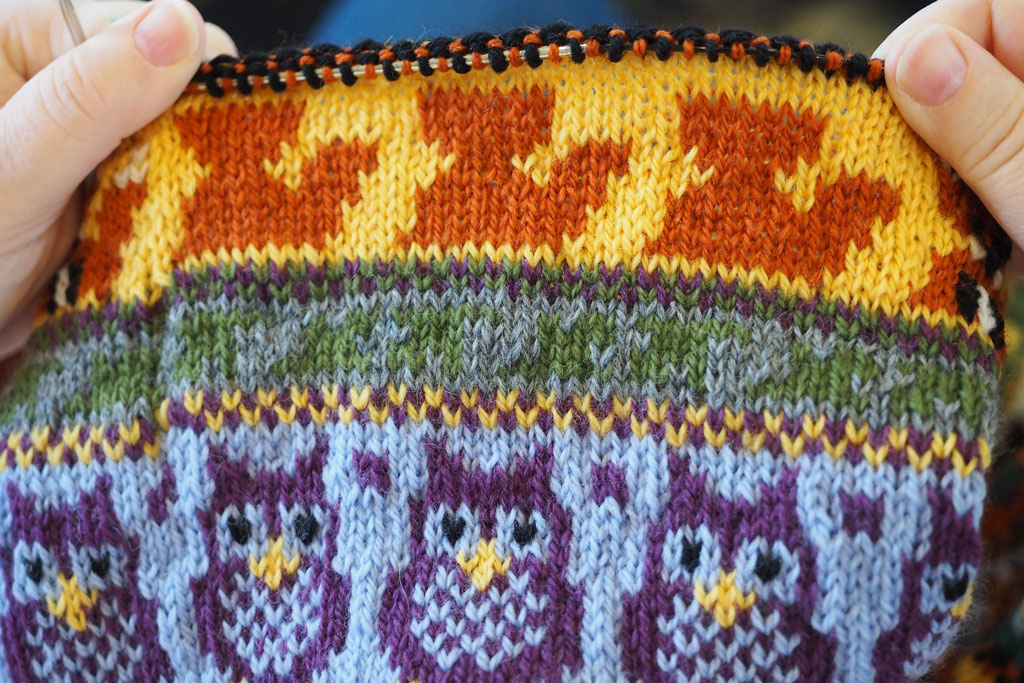
Sort of an odd orange lump with a flat top! But fear not, we will get that fox face in shape.
Starting with the fox’s eyes, thread some of the black yarn through your yarn needle. Locate the first stitch, the right eye (actually it’s the fox’s left eye, but you know what I mean). Once you have located the stitch on the chart and matched it up with the stitch on your knitting, you will pull your needle through, from wrong side to right side, at the bottom point of the stitch, where the two halves of the “V” come together.
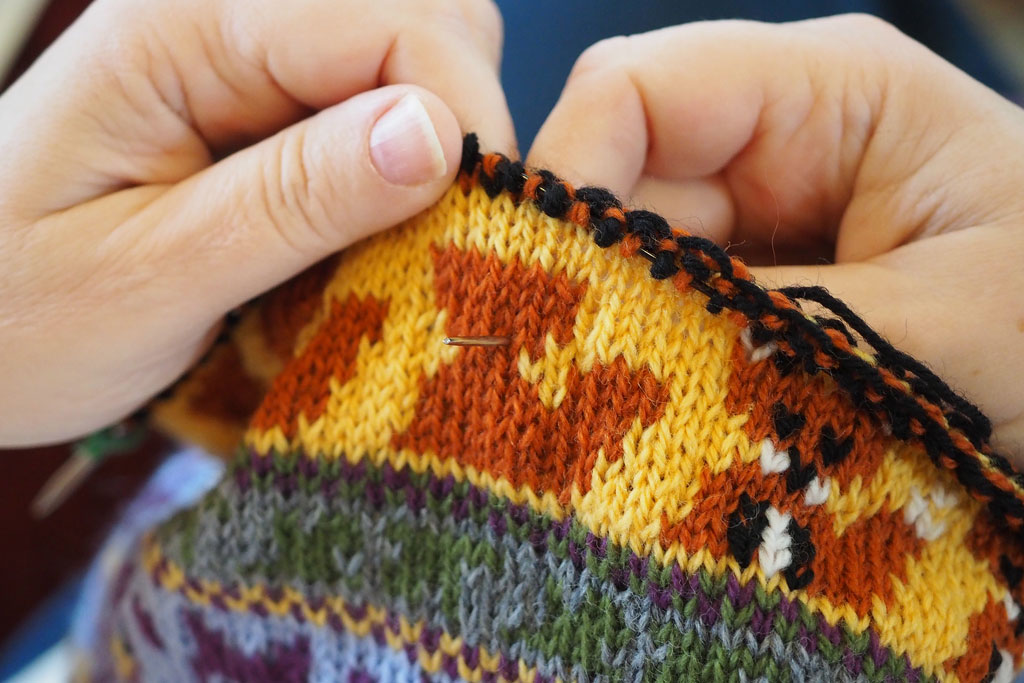
It will look quite low on the fox’s face, but I promise, it will work out well!
Now pull your yarn through, leaving a tail of several inches on the wrong side to be woven in later. Hold that tail down tightly so you don’t pull it through.
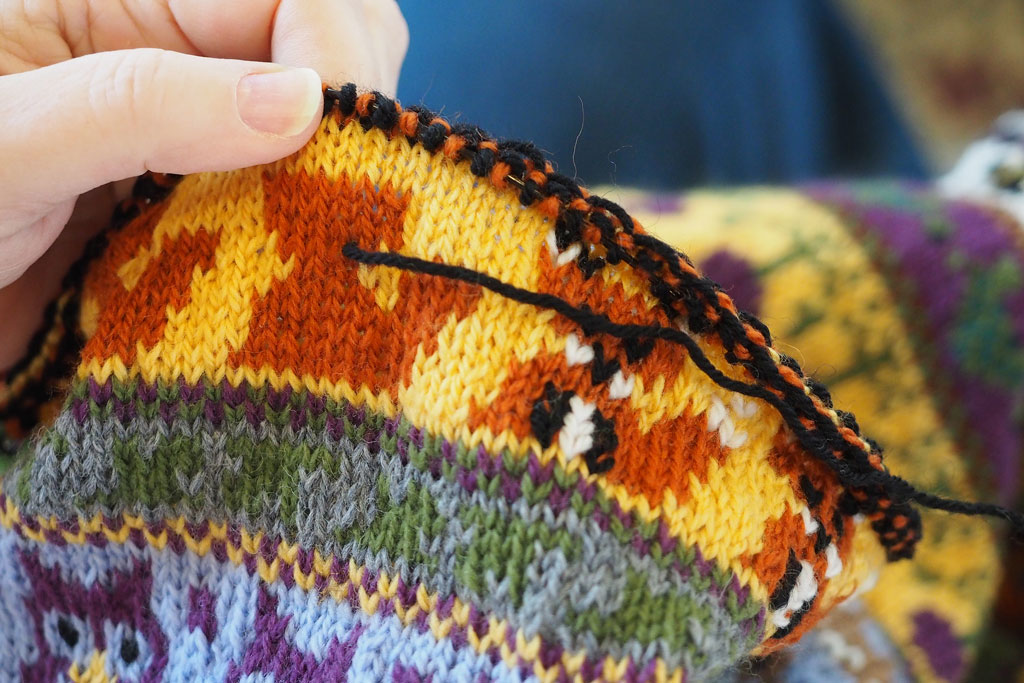
Now comes the trickiest but also the most satisfying part of the duplicate stitch: running the yarn behind the upper part of the “V” so that it creates the right half of the “V” and sets you up to make the left half, all at once! To do this, slide your needle from right to left behind the “V” of the stitch ABOVE the one you will be covering with your duplicate stitch:
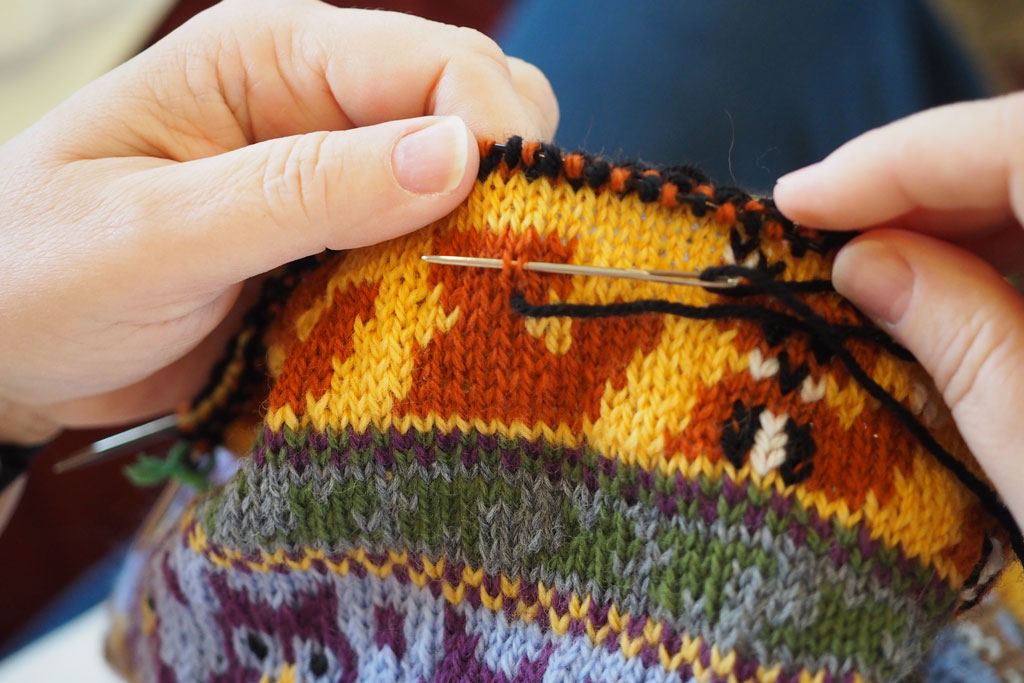
Once you pull your yarn through, it will magically create the right half of the “V”.
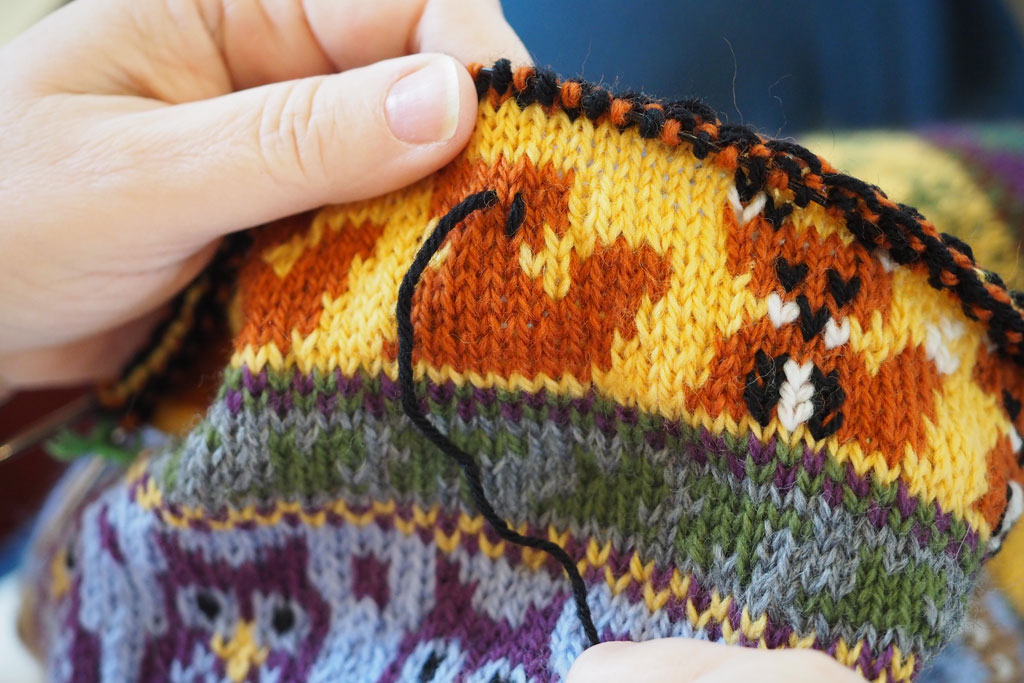
Now it’s easy to work the last step of the duplicate stitch: push the needle through from right side to wrong side, completing the final half of the “V”. One stitch done!
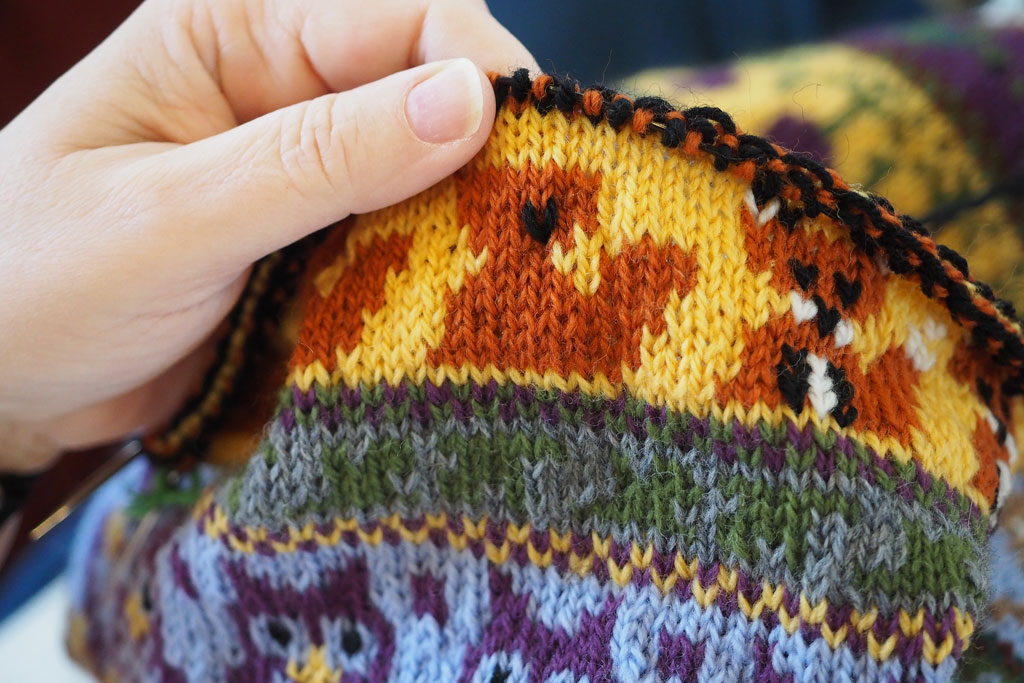
The key with duplicate stitch is to adjust each stitch so it looks right before you move on. Also, with this scarf, you will want to work duplicate stitch on each motif, then move on to the next motif. Leaving ALL the duplicate stitch to the very end, when you have completed the entire scarf, will be a mistake. First, the scarf is such a long tube, it will be difficult to work the stitches in the middle part of the tube. Second, you will get SO bored with all the duplicate stitching. So knit one motif, duplicate stitch it, then knit the next motif, etc.
Once you have the black stitches completed, you can add the white stitches (I like to work from darkest color to lightest color). One last set of photos here, just to reiterate.
Step one: pull yarn from back to front at the bottom point of the “V” you want to create.
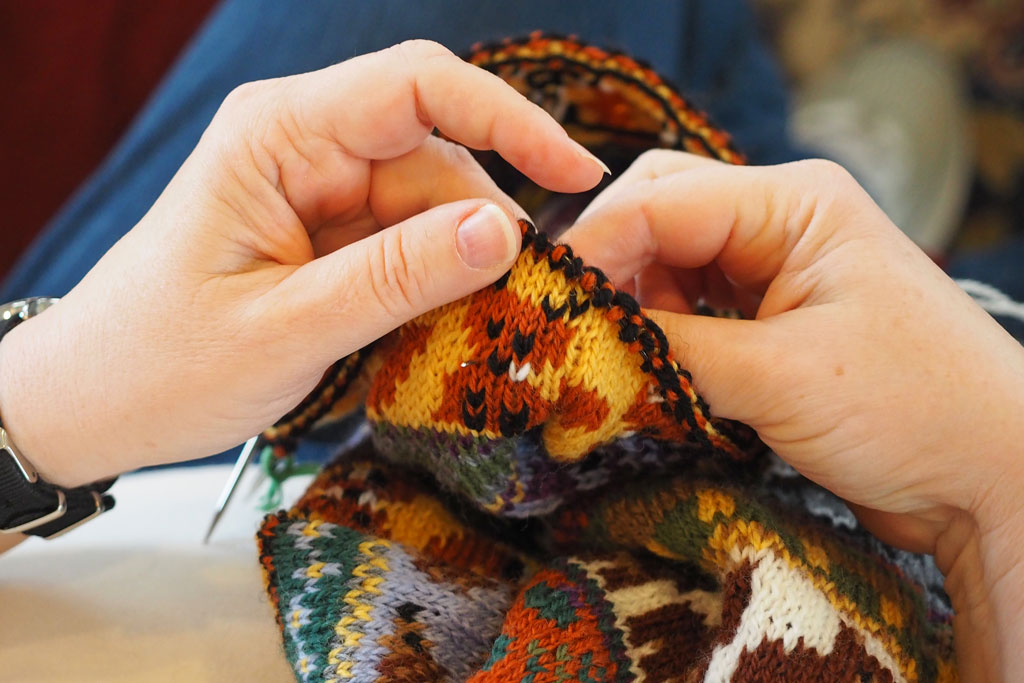
Step 2: Slide needle behind “V” of the stitch ABOVE the one you are covering:
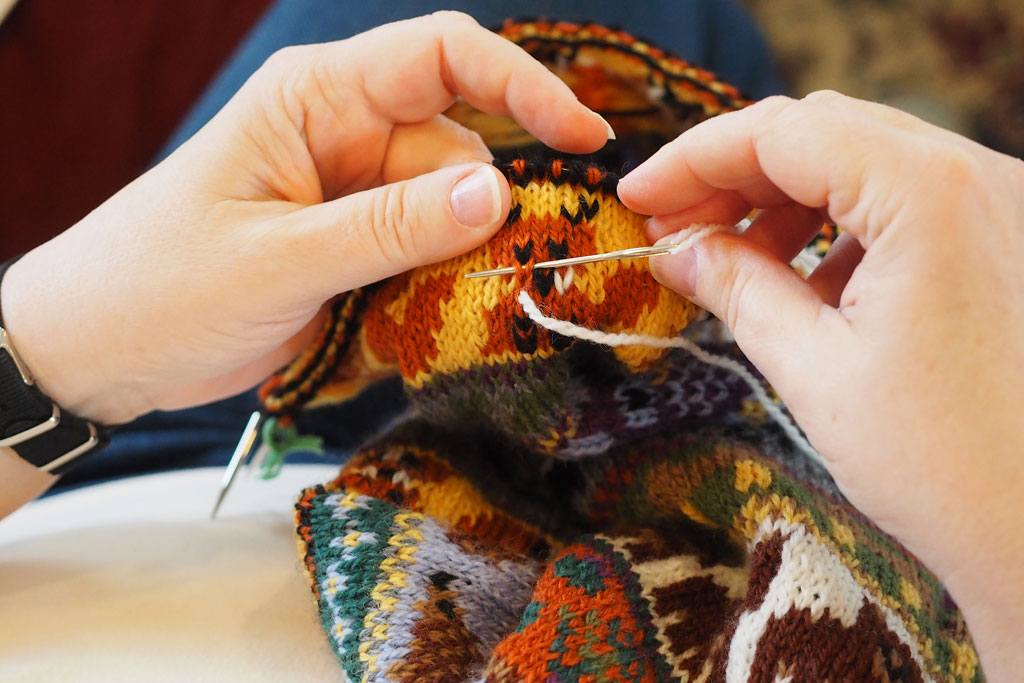
Step 3: Finish your V by pulling yarn from front to back through that first point, the bottom of your “V” stitch.
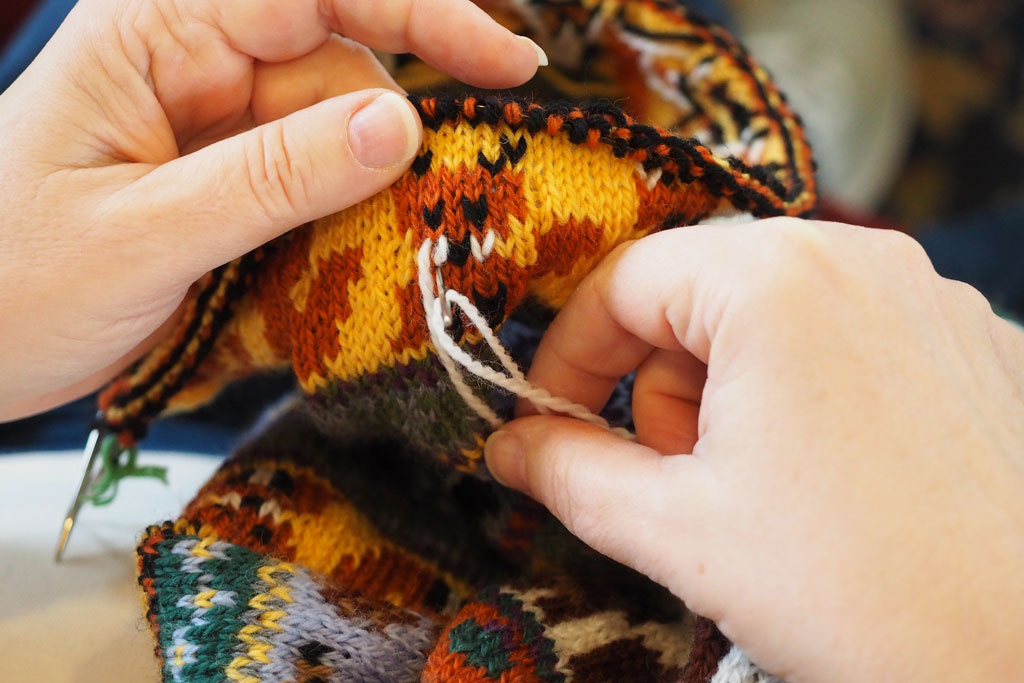
Final product: an adorable little fox!
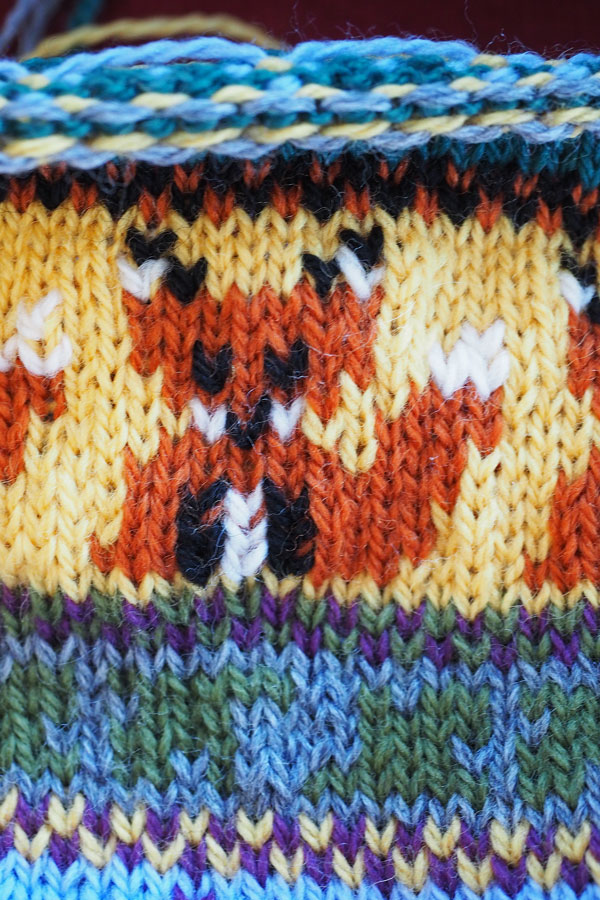
Adjust those stitches so they are plump and provide good coverage, and away you go!
Stay tuned next time, when I will offer a tutorial on finishing the scarf. First up: tassels!
This is the best (and most beautiful) photo tutorial on duplicate stitch I have ever seen and the advice about when to do it is invaluable to me. thank you.
Thank you so much, Melissa! I am really happy to hear that this tutorial was helpful to you!